What Counts as Repairable Damage
When you repair damaged photos, you are fixing physical injuries to the print, not just age. Look for the usual suspects: thin white scratches from sleeves and albums, straight creases where the print was folded, torn corners and split edges, yellow or brown tape stains, soft water marks with wavy tide lines, and dark speckles near the borders where damp has settled. Fading and yellowing often sit on top, which makes the image look worse than it is.
Most of this damage is fixable because the information underneath survives. A scratch removes only a narrow line of pixels, a crease darkens a fold but leaves shapes readable, and a stain shifts color without erasing faces. AI samples the clean area around each mark and rebuilds skin, fabric, and background in one consistent pass. You get the biggest win where tears run through background, hair, or clothing rather than through the center of an eye or mouth.
Sort your prints into two piles. In the first, put images where you can still trace every face, hand, and key object even if a line crosses it. In the second, put images where a face is gone, paper is missing, or the surface feels soft, sticky, or powdery. The first pile suits an online workflow, while the second needs lower expectations and a look at the pro-help section below.
Prep the Print Before You Scan
Spend five minutes on prep and you will restore scratched photos and creased prints with far fewer artifacts. If the print is curled, rest it under a heavy book for a few hours until it lies flat. Lift dust with a soft dry brush or microfiber cloth, and never use water or cleaning fluid on an old emulsion. If a torn edge fits cleanly, align the pieces gently on the scanner bed without stretching the paper.
Scan in color at 600 DPI and save as TIFF or highest-quality JPEG, even for black-and-white prints, because color channels preserve stain and fading clues. Frame the print squarely with a small border so torn edges stay visible, and never crop into the damage. If your preview looks soft or hazy, fix the source file first with this guide to fixing scan blur first before you run any repair.
Step-by-Step Repair Workflow
If you are learning how to repair old photos without manual cloning or masks, use this short pass built for physical defects. Prepare one strong file, run one AI repair, then inspect the details that matter most on prints. Keep your original scan untouched so you can compare or retry from a clean source.
Step 1: Upload
Pick your flattest, sharpest scan and trim only the scanner background, leaving damaged edges visible. Upload the full-resolution file without extra sharpening filters, which bake bright halos around scratches. When you hold several versions, choose the one where faces look clearest at full zoom, and name it clearly so you can match the before-and-after pair.
Step 2: Let AI repair
To repair old photos online, upload your scan to the PixRestorer restore tool and run one pass, which takes about 30 seconds. The model removes scratches, softens creases, evens fading and stains, and rebuilds torn areas from surrounding detail. Run only one pass first and avoid stacking other filters, so skin texture and paper grain stay consistent.
Step 3: Review and download
Compare the before and after images side by side at full size. Start with edges and confirm torn borders look straight and continuous, then check faces for natural eyes, teeth, and glasses. Read text on signs or captions letter by letter, and scan fabric, hair, and walls for smooth texture without smearing. When a small spot survives, retry once from a slightly tighter crop. Then download the highest-resolution file and archive it beside your original.
Real repair example: torn and scratched print
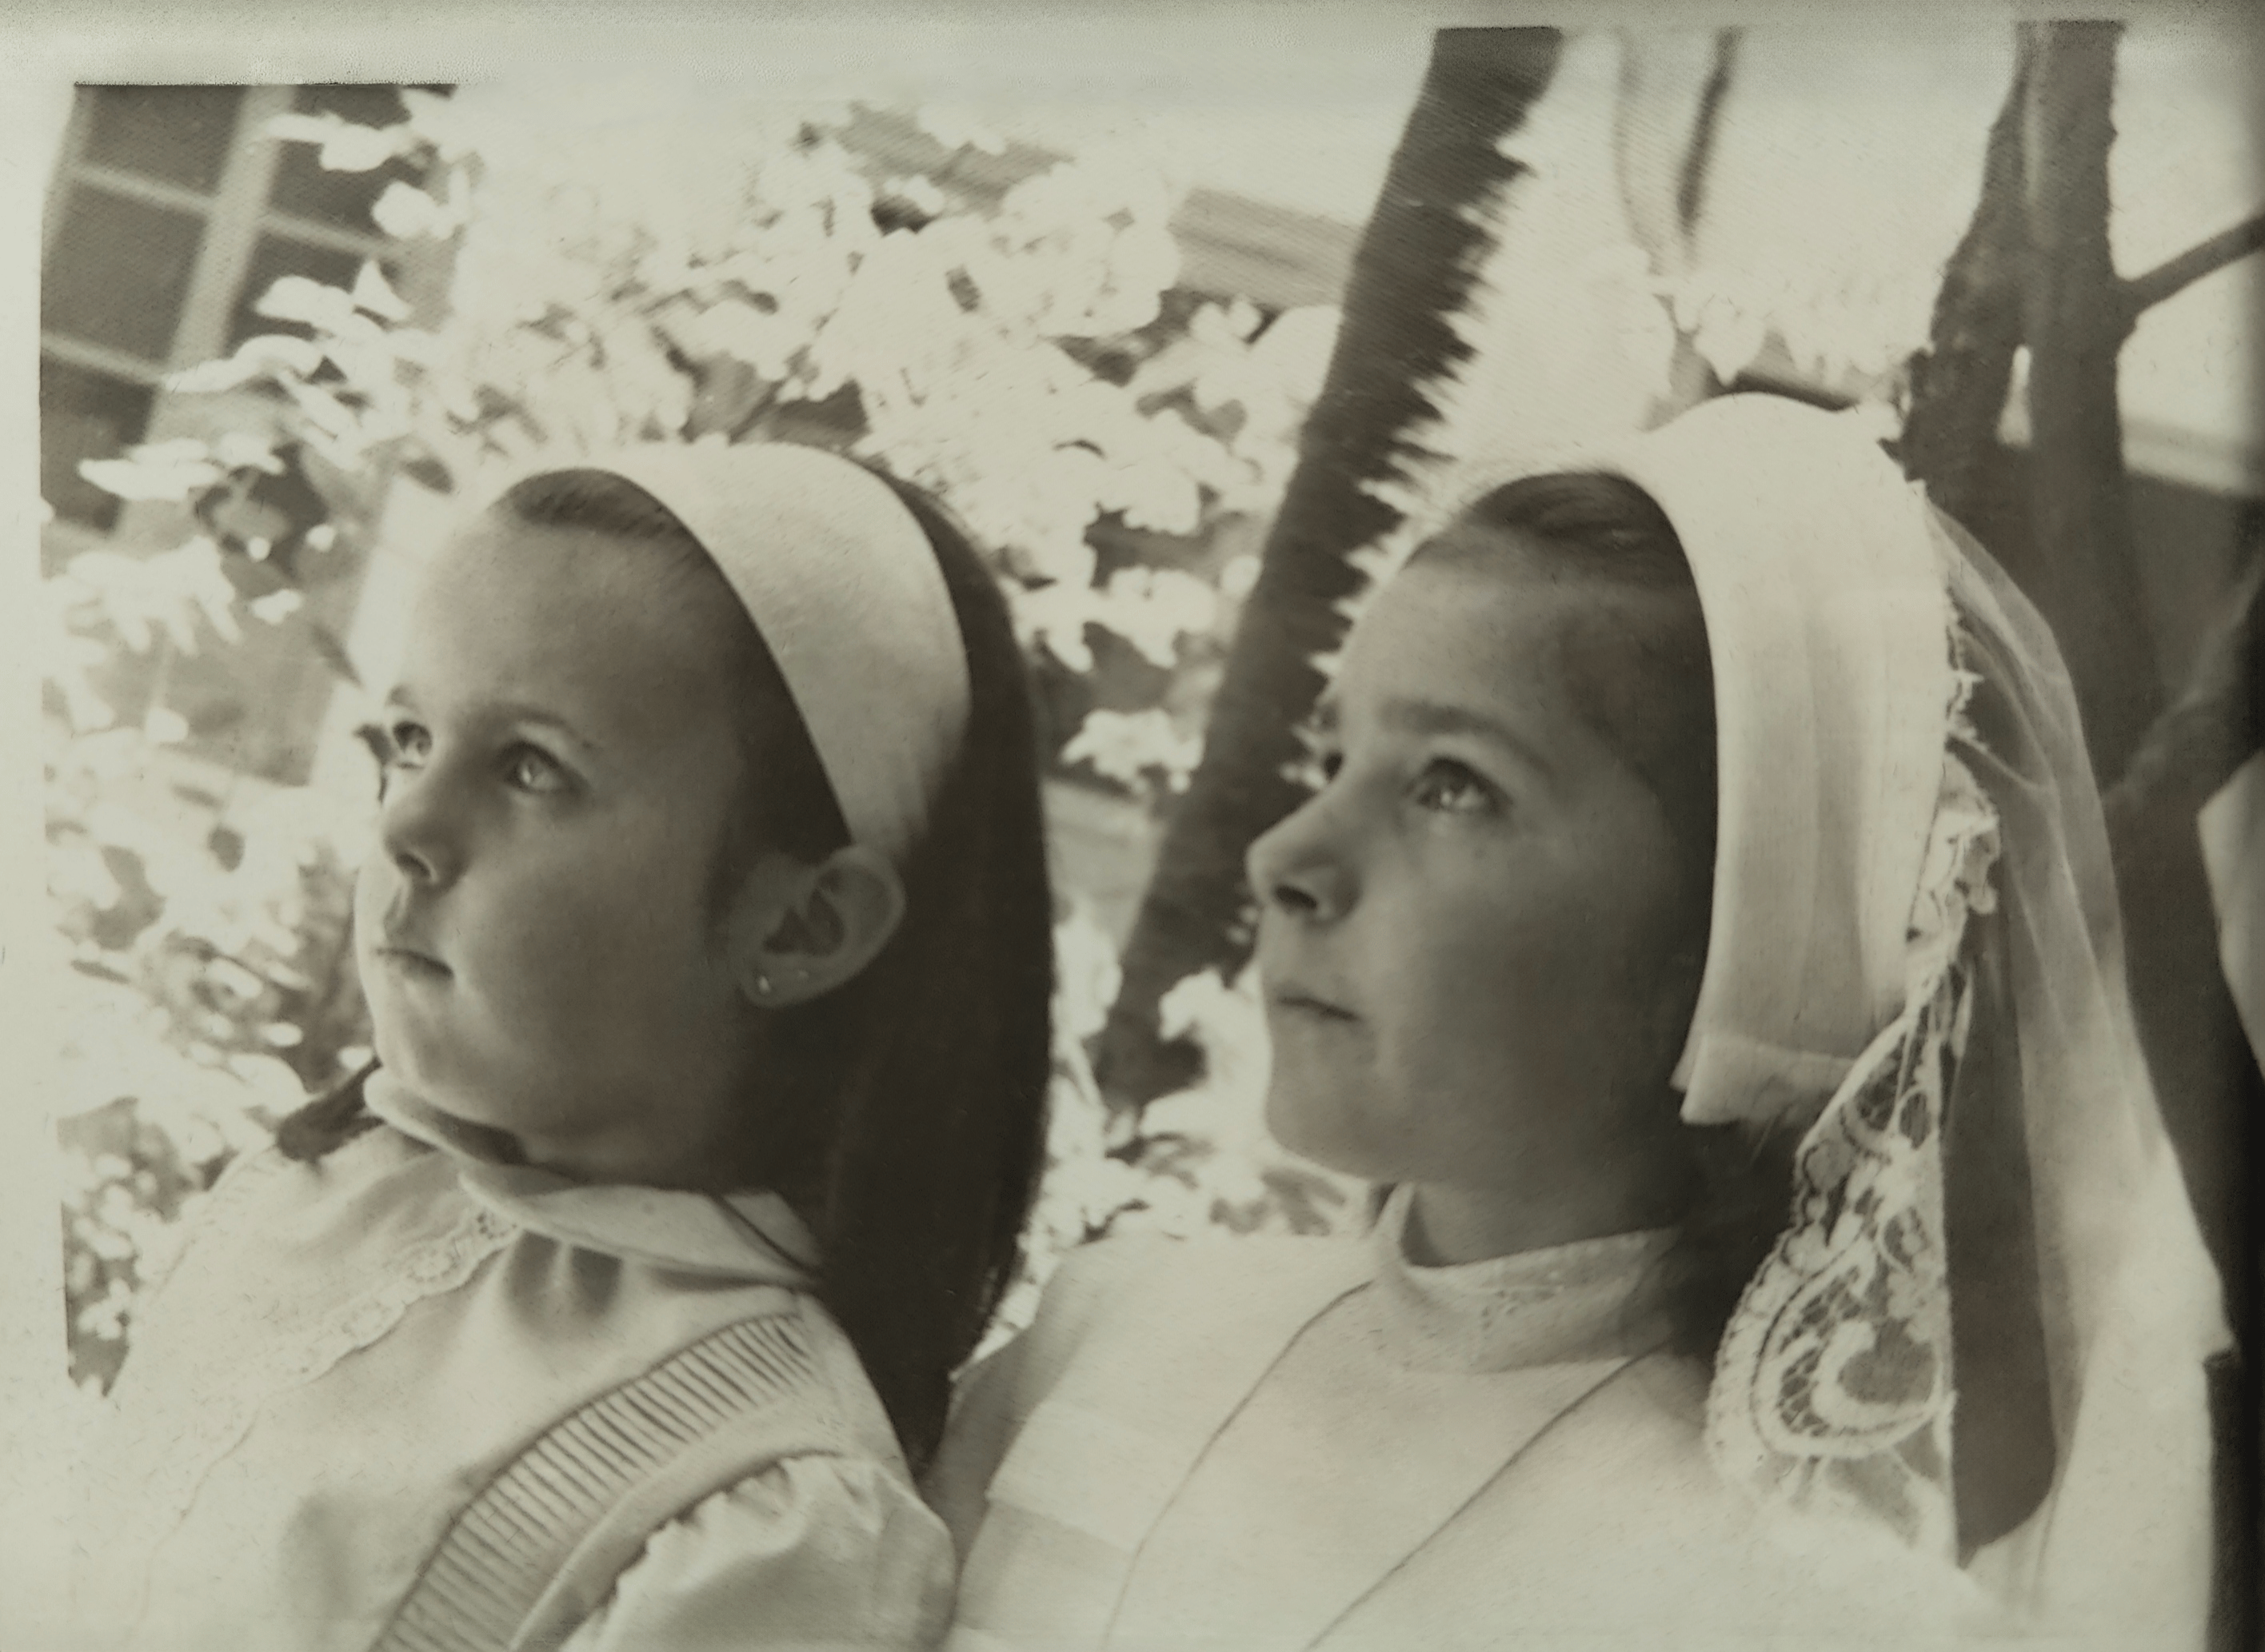
Before: scratches, fading, and wear across the print
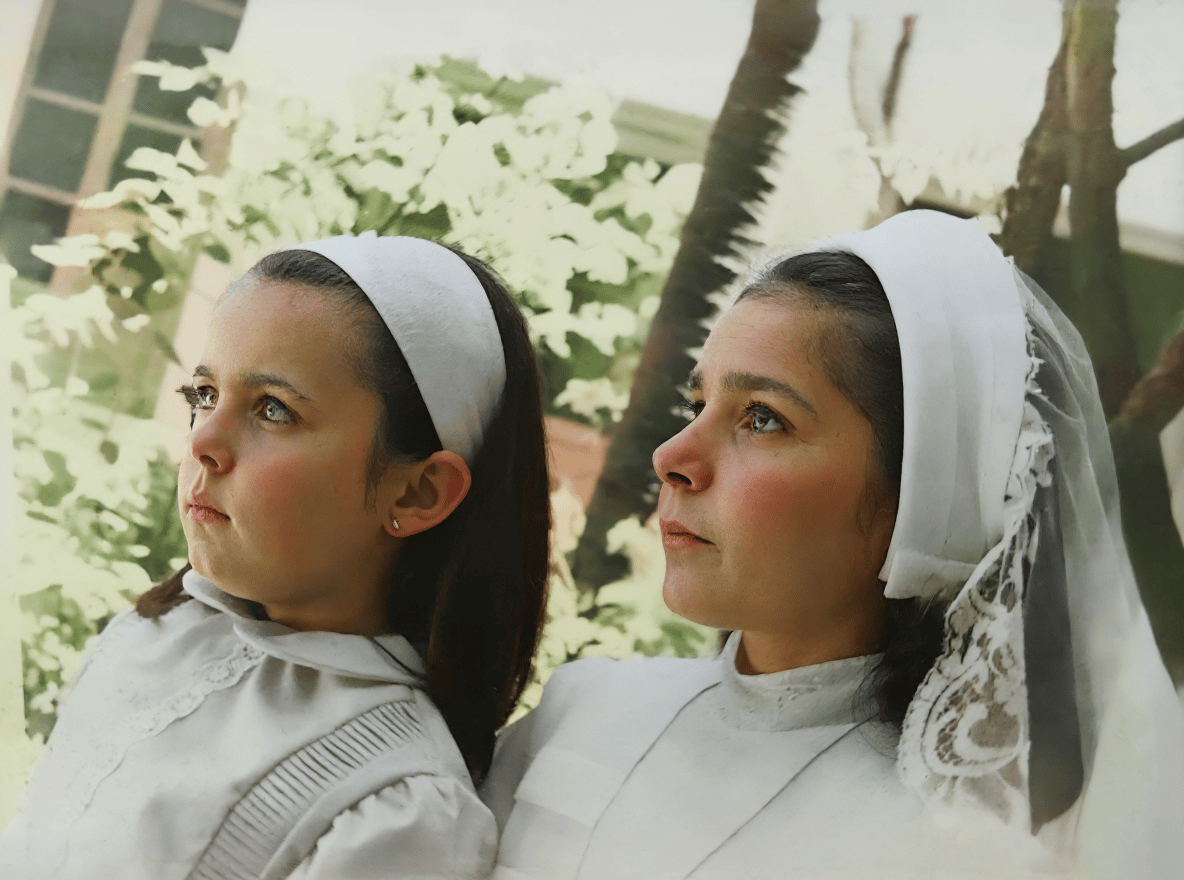
After: damage filled, tones evened, detail recovered
One AI pass repaired this print in under 30 seconds using PixRestorer.
Fix Torn Photos With Broken Edges and Deep Creases
Tears and creases break structure rather than color, so inspect them closely. A clean tear through sky, wall, or clothing usually resolves well — trace the repaired line and confirm horizons, stripes, and patterns join without kinks. A fold across a face needs a slower check at full zoom: follow the crease for ghost lines, uneven lips, or glasses that bend where they should stay straight. When you see wobble, a flatter rescan usually helps more than another edit.
Do not cut away damaged borders before uploading, because the model uses edge context to infer what continues past a tear. A narrow strip of scanner background beats a tight crop through a missing corner, and you can trim for printing afterward. On deep white creases, confirm the bright line is truly gone rather than blurred, especially over dark jackets or hair. Leave colorization for later and keep this pass focused on structure and tone.
When AI Is Not Enough
Some prints need hands, not algorithms. Call a professional conservator or retoucher when a face is fully gone, when roughly a quarter or more of the image is missing, when mold has eaten the surface into craters, or when paper is stuck to glass or flaking apart. These cases need manual rebuilding and sometimes physical conservation before any scan can succeed.
Pause on safety too. If you see fuzzy growth or smell strong mustiness, do not scrub the surface or breathe the dust. Wear a mask, isolate the print in a dry paper envelope, and ask an archivist about safe handling. Even then, one AI pass works as a diagnostic: you learn which zones need hand work and you gain a clean reference file to send alongside your original scan.
Frequently Asked Questions
Can AI repair torn photos?
Yes, for most clean tears where the missing strip is narrow and nearby background, hair, or clothing stays intact. Upload a flat 600 DPI scan with the torn edges visible, run one pass, then confirm that lines and patterns join correctly. When half a face is gone or paper chunks are missing, a professional retoucher will rebuild the area more accurately.
How much does it cost to repair old photos?
It depends on the damage and the method. AI tools typically charge a few dollars per image or sell small credit packs, which covers scratches, creases, stains, and fading. Manual retouching by a professional costs much more, often tens to hundreds of dollars per photo, because an editor rebuilds missing zones by hand. Start with AI for routine damage and reserve expert help for severe cases.
Can I repair old photographs from a phone picture?
Yes, when you photograph the print carefully. Lay it flat in soft daylight, hold your phone parallel to avoid tilt, leave a small border, and switch off the flash to prevent glare. A flatbed scan at 600 DPI still gives sharper lines around deep creases and small faces, so use a scanner whenever you can.
Will repair change faces or text?
A good pass preserves identity and lettering while cleaning the damage around them. Inspect eyes, mouth, glasses, and any signs or captions at full zoom after each run. When small letters look reinterpreted or skin looks over-smoothed, retry from a sharper scan and avoid stacking extra filters. For archival portraits, keep the original scan and ask a specialist to verify critical faces.
Try It Yourself
Try it yourself with your most scratched or creased print first, since those show the clearest before-and-after change. Upload your 600 DPI scan, run one pass, check faces, edges, and text, then download the result and share it with your family.
Start Repairing Now