Decide What New Means for Each Photo
Before you touch any tool, sort your pile into three buckets, because not every image needs the same work. Bucket one is damaged color photos: creases, scratches, dust spots, tears, water marks, or soft faces. Bucket two is intact but faded color photos: the picture is complete, yet skin looks pale, skies look washed out, and shadows have shifted yellow or magenta. Bucket three is black-and-white, sepia, or near-monochrome prints where the structure is fine but you want a modern color version.
This quick triage saves you time and credits. You will run every photo through Pass 1, only color photos through Pass 2, and only monochrome prints through Pass 3. If you are unsure which bucket a photo belongs in, start with the repair pass and judge the color afterward. Aim for a clean file so your old photos look new again without looking over-edited, and it still feels like the same memory. Lay out ten photos, label each as repair, revive, or colorize, and work in batches so you build a rhythm.
Pass 1: Repair the Damage
Start by fixing structure, because no color work looks right over cracks and blur. Scan the print at 600 DPI if you can, wipe dust from the scanner glass, keep the print flat, and save a high-quality JPG or PNG. A straight, sharp scan gives the AI more edge and face detail to rebuild, which matters more than any setting tweak later.
Upload that file to restore old photos with an AI repair pass that fills scratches, softens creases, sharpens soft faces, and cleans spots in one go. You just review the before-and-after at full zoom: check eyes, teeth, hands, and straight lines like door frames for warping or over-smoothing. If faces look waxy or text looks melted, try a cleaner rescan rather than running the same file twice. Do not crop tightly yet, because you may need the edges for the color passes. For the full click-by-click repair detail, follow the no-Photoshop workflow. Once the surface is clean and faces are readable, lock that version and move on. You do not need perfection here, just a stable base with no distracting damage.
Real renewal example: damaged print to clean master
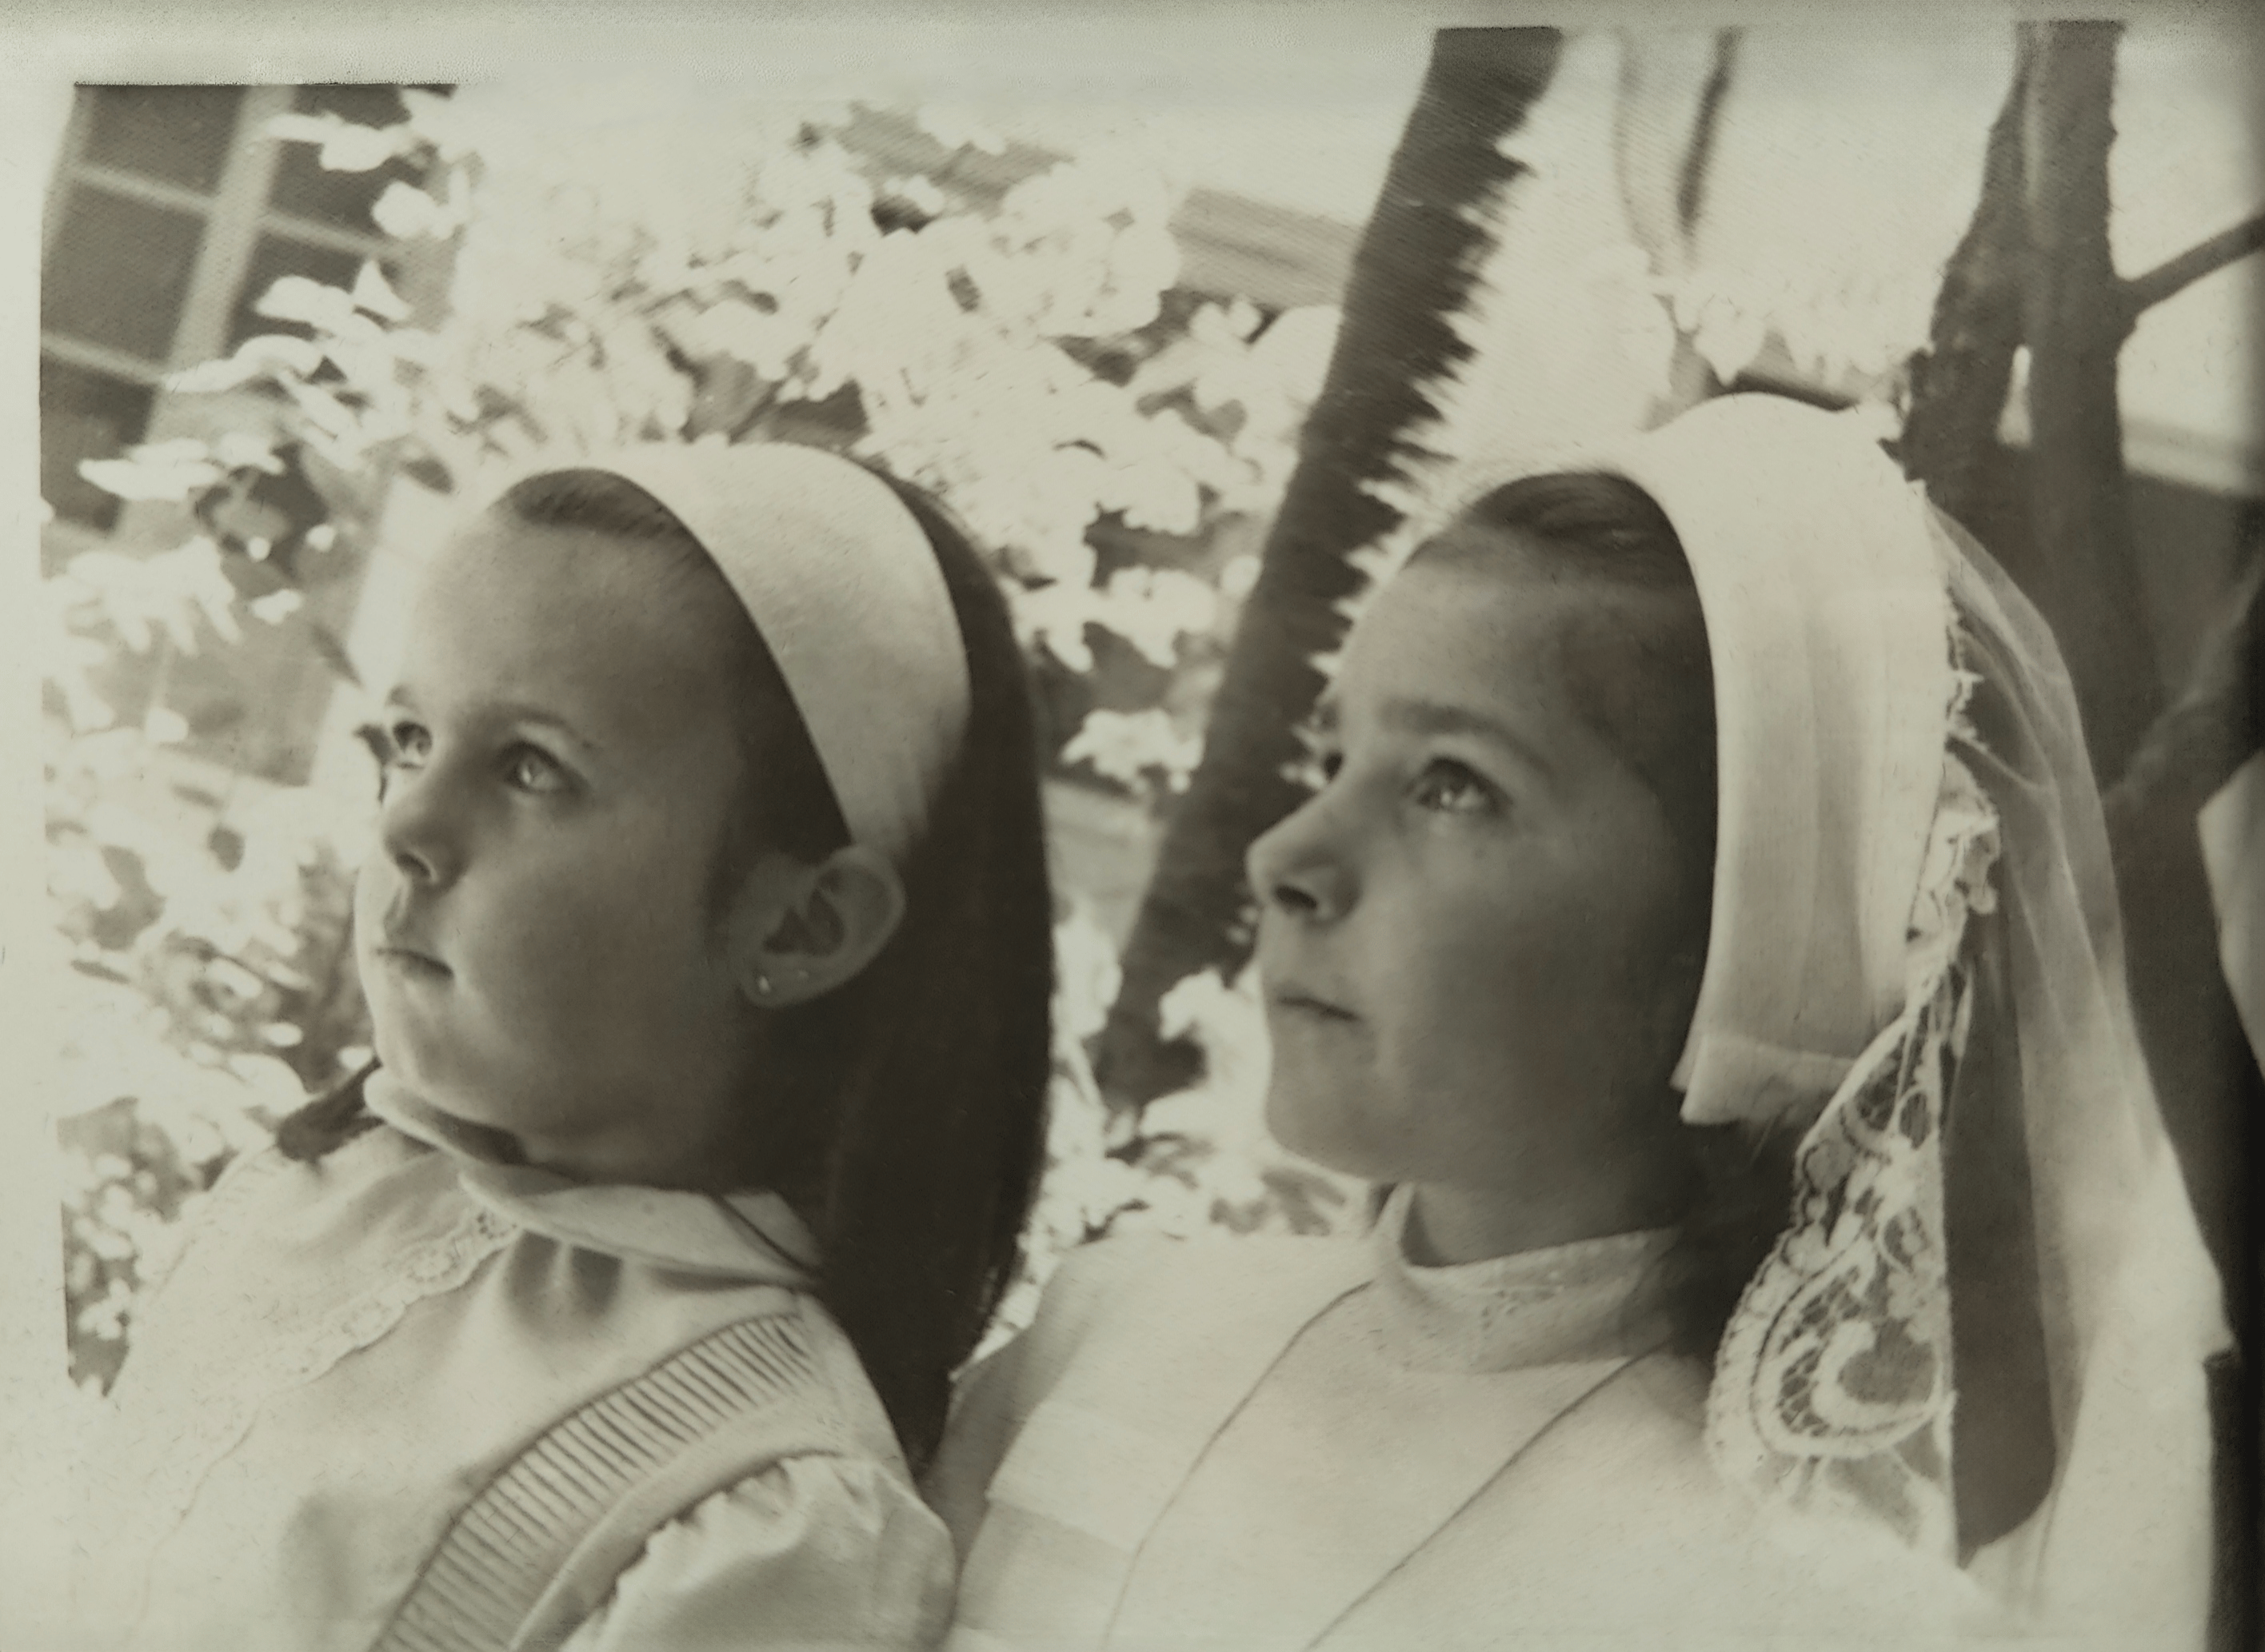
Before: scratches, fading, and dull tones
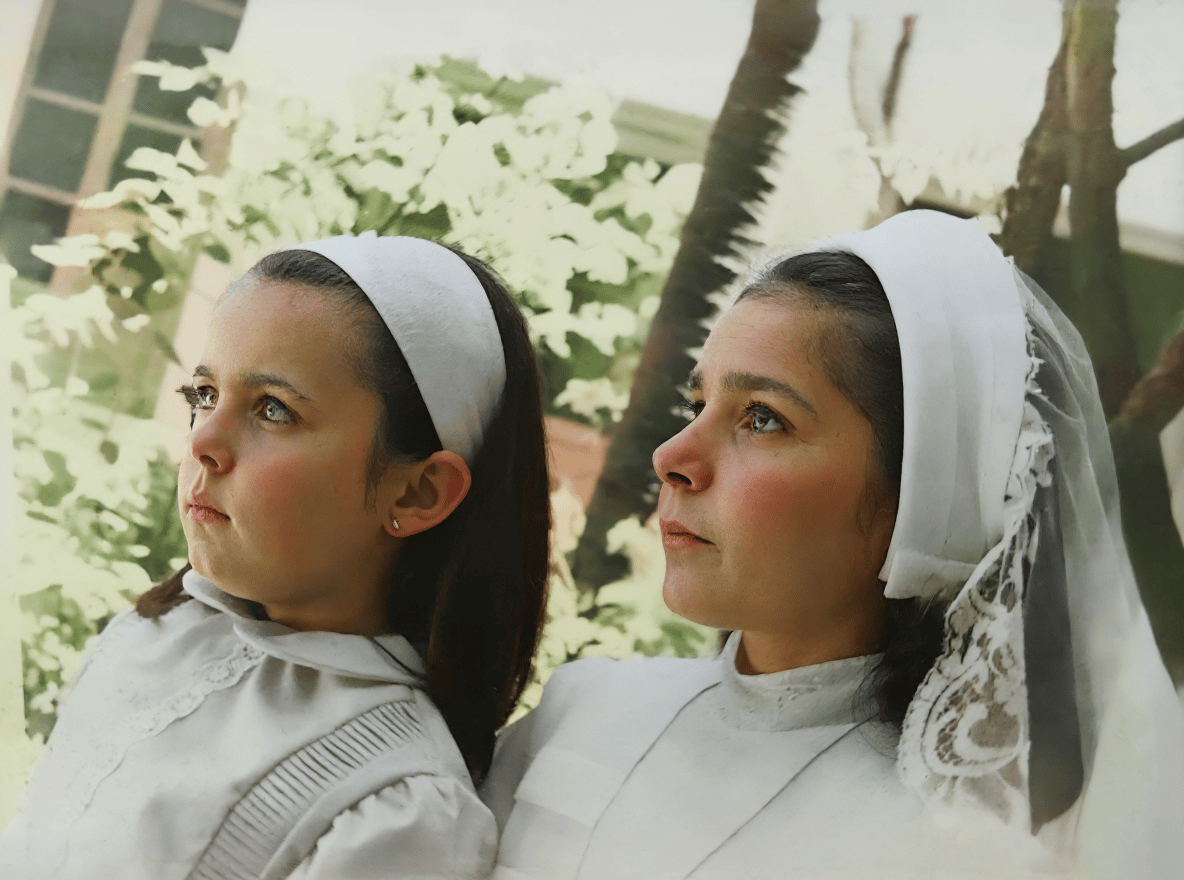
After: clean surface, fresh color, same memory
Repair plus color revival on PixRestorer — about a minute of work.
Pass 2: Bring Faded Color Back
With damage gone, you can judge color honestly. Fading happens because dyes break down unevenly, so old color prints often shift yellow, lose contrast, or look milky in the highlights. Your job in this pass is to restore faded photos to balanced, believable color, not to create a hyper-saturated modern look.
Run a color-revival pass and compare the result to your memory of the scene rather than to the faded scan. You want neutral whites, natural skin, and clear separation between sky, clothing, and background. If the first result looks too warm or too cool, adjust white balance slightly and stop. A common mistake is pushing saturation until faces turn orange, so pull back one step when skin starts to glow. Keep a copy of the repaired-but-unrevived version, because you may prefer the softer vintage tone for some images. Work photo by photo here, since two prints from the same year can fade very differently depending on paper, sun exposure, and storage. When the image looks fresh but still familiar, you are done. Color photos skip Pass 3 entirely and go straight to finishing.
Pass 3: Color for Black-and-White Prints
Use this pass only for true black-and-white, sepia, or faded-to-gray prints. To colorize old photos, start from your repaired version, not the raw scan, so cracks and blur do not confuse the color model. Run one test image first and study skin tones, clothing, foliage, and sky for consistency. You want believable variation, not flat gray or neon patches.
If uniforms, flags, or interiors need exact hues for historical reasons, keep the original monochrome as your archive master and share the color version as an alternate. Do not stack multiple color tools on the same file, because each pass smooths detail a little more. For scan prep, review checks, and realistic expectations, see the dedicated colorize guide. When the color feels natural and the faces still look like your relatives, download that version and move to finishing.
Finish: Review, Upscale, Print and Share
This final check is what makes people say you truly revive old family photos instead of just filtering them. Open each finished file at 100 percent and compare it side by side with the original scan. You are looking for three things: identity preserved, no new artifacts, and a print-ready file size. Zoom to faces first, then scan backgrounds for smeared patterns, halos, or warped text. If you spot a flaw, revert to your Pass 1 file rather than patching the color file.
Next, upscale only the keepers you plan to print, frame, or crop tightly. Upscaling after repair and color work preserves cleaner edges than enlarging a damaged scan. Save masters as high-quality JPG or PNG with clear names like rivera-1968-renewed.jpg, and keep the original scans untouched in a separate folder. Then share with purpose: send full-resolution files to family, order matte prints for albums, and post smaller compressed copies online. Your archive now has three layers — original scan, renewed master, and share copy — so future you can reprint without starting over.
Frequently Asked Questions
How long does it take to make an old photo look new?
About one to two minutes per photo: under a minute for the AI pass plus a minute to zoom in and review faces and edges. A batch of ten clean scans usually takes under half an hour. Heavily torn prints add time only if you need a rescan.
Can I make old photos look better without Photoshop?
Yes. Scan at 600 DPI, run an AI repair pass for scratches and blur, then do a light color-revival pass and stop when skin looks natural. You can follow a guided AI workflow instead of learning layers, masks, and clone stamps.
Should I colorize or keep the original look?
Keep both. Save the repaired original — color-revived or monochrome — as your master, then save a colorized copy as an alternate to share. If exact hues matter for uniforms or historic details, treat the monochrome file as the source of truth.
What order: repair or colorize first?
Always repair first, then handle color. Scratches, blur, and spots confuse color models and lead to tinted cracks or blotchy skin. Once the surface is clean, revival or colorization has a stable base to work from.
Try It Yourself
Try it yourself with one photo from each bucket: repair the damaged ones, revive the faded ones, and add color to the black-and-white prints. You will know your pipeline works when the first three renewals look clean, familiar, and ready to share.