Enhancement vs Restoration vs Upscaling
People use these three words interchangeably, but they mean different jobs. Restoration repairs damage. Upscaling changes pixel dimensions. Enhancement improves how clean, sharp, and clear your existing pixels look.
If you want to enhance old photo quality, you are asking for the middle job: less blur, less noise, better clarity, better tone, and crisper edges — not a rebuild of missing parts and not just a bigger file.
| Job | What it fixes | When you need it |
|---|---|---|
| Restoration | Spots, dust, stains, tears | The print is physically damaged |
| Enhancement | Softness, blur, noise, flat contrast | The photo looks tired but is mostly intact |
| Upscaling | Low pixel count | You need a larger file for print or display |
Most family prints from the 1960s to the 2000s need enhancement first. Upscale only after enhancement looks good — enlarging a blurry file just enlarges the blur.
Diagnose What Is Wrong With Your Photo First
Do not run every filter at once. View your photo at 100% zoom for ten seconds and decide which of these three problems dominates.
First is softness and blur. Edges look smeared, eyes lack catchlights, and fine hair blends together. This usually comes from camera shake, missed focus, or movement during a long exposure. Enhancement helps this the most, because sharpening and deblur rebuild edge contrast.
Second is compression and noise. You see blocky patches in skies, speckled grain in shadows, or halos around high-contrast edges. This happens when the photo was saved as a low-quality JPEG, shared through messaging apps, or photographed off a screen. Enhancement can smooth noise while protecting edges, but it cannot fully recover texture that compression destroyed.
Third is fading and flat tone. Blacks look gray, colors look washed out, and the whole image looks hazy. This comes from dye fading, sunlight, poor storage, or a bad scan with auto-exposure. Fix exposure before you judge sharpness, because a flat image always looks softer than it is. If your starting file is a phone picture of an album print with glare and skew, check scan-quality preconditions like even lighting and full-resolution save in this guide to fixing blurry and scratched scans before you enhance, because no enhancer compensates for reflections or a cropped low-resolution capture.
Step-by-Step Enhance Workflow
You only need a browser and your best source file. Use the best original you have — a flatbed scan beats a phone copy, and the original JPEG beats a social-media screenshot.
Step 1: Upload
Upload your JPG, PNG, or TIFF without extra edits. Do not pre-sharpen, add filters, or enlarge it first. If the scan has large white borders, crop loosely so the photo fills the frame, but leave a small margin.
Step 2: Let AI enhance
You can enhance old photos with AI in a single pass that sharpens details, reduces blur and noise, and rebalances clarity. Keep the strength at the default for your first run. That default is tuned to recover faces and texture without overshooting. Resist stacking three different enhancers — each pass reinterprets the pixels and soft detail turns brittle fast.
Step 3: Compare and download
Compare before and after at two sizes: full-screen for your phone or laptop, and 100% zoom for detail. Look at eyes, teeth, fabric, and background text. If edges look clean and skin still shows natural pores, download the full-resolution file as PNG or highest-quality JPG with a new filename so your original stays untouched. If you plan to print, test a small 4x6 print before ordering a large enlargement.
Real enhancement example: soft print, sharper result
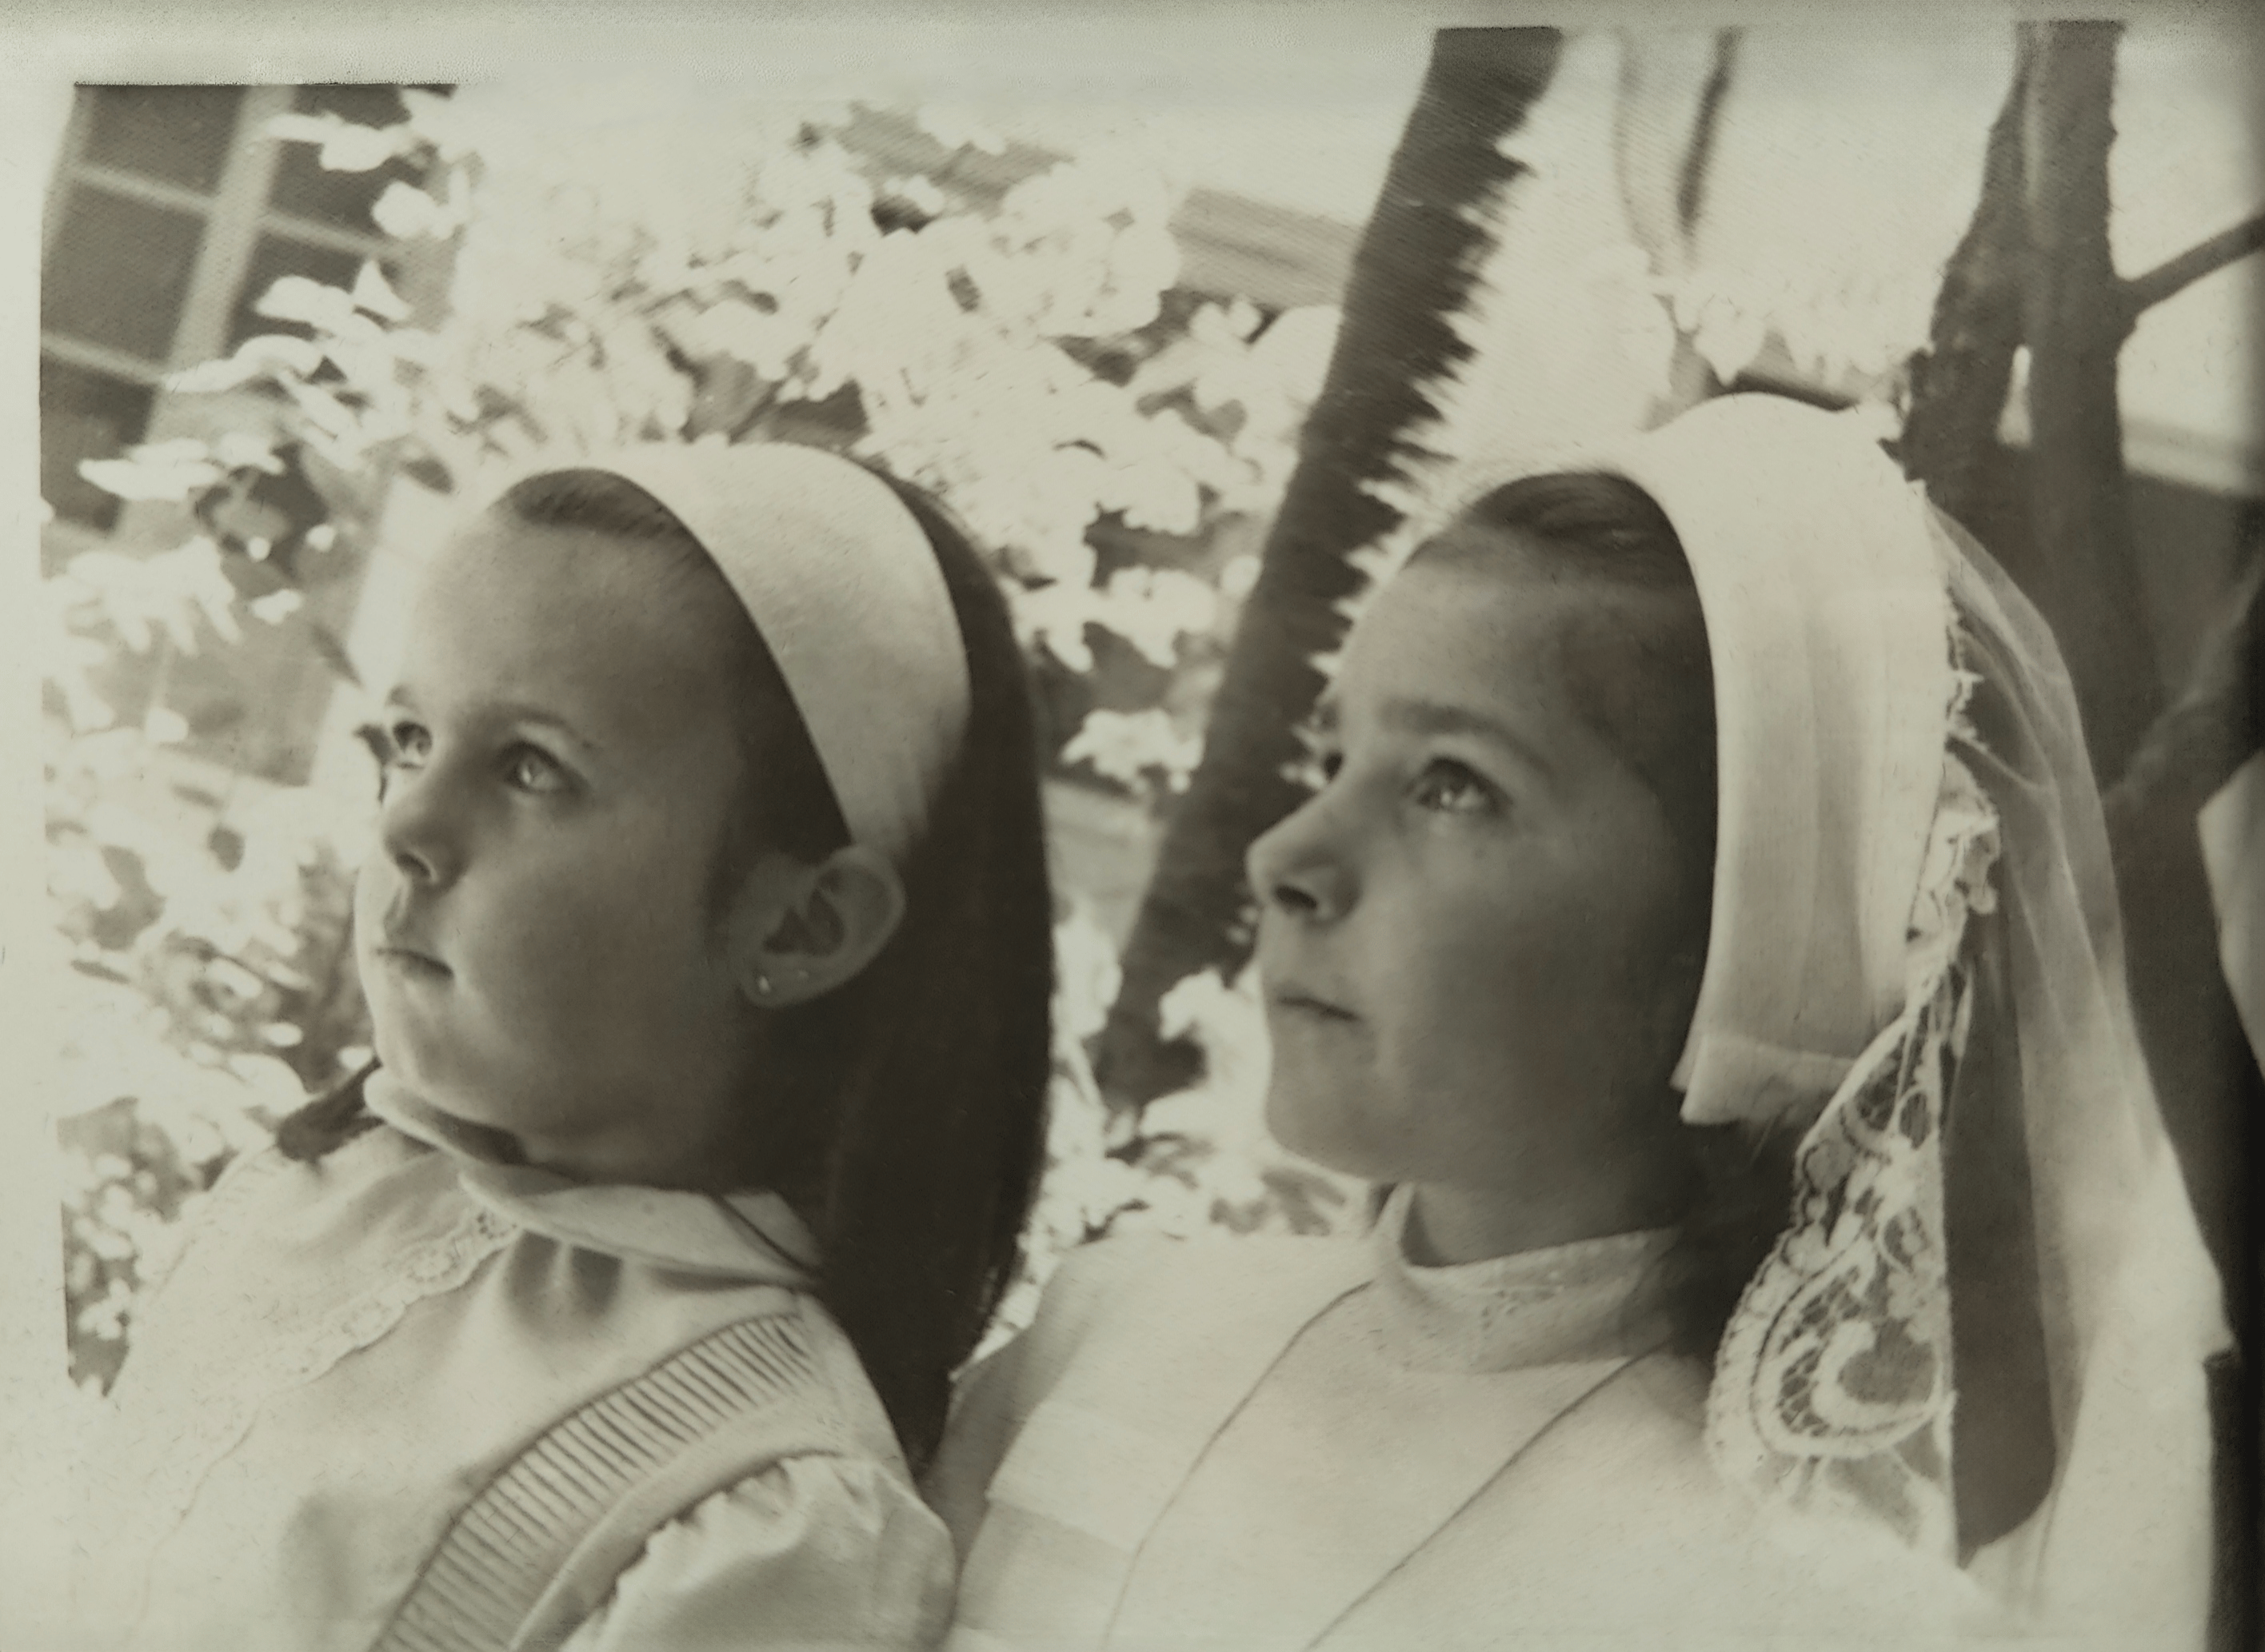
Before: soft detail, flat tones, visible wear

After: tighter edges, cleaner tones, natural texture
One enhancement pass on PixRestorer, finished in under 30 seconds.
Sharpen Soft Faces Without the Plastic Look
Faces are where enhancement succeeds or fails. When you sharpen old photos, aim for edge definition, not glassy skin. Good sharpening separates eyelashes, gives lips a clean border, and keeps wrinkles as real texture rather than smudges. Bad sharpening turns everyone into wax figures with glowing outlines.
Start with the eyes. Zoom to 100% and check whether you can see individual lashes and the rim of the iris. If those appear, stop — your faces are done. Pushing further adds halos around noses and ears and turns freckles into noise. If skin already looks smooth, use the lowest effective strength, because film grain plus heavy smoothing creates a fake plastic mask.
Watch for three warning signs of over-processing: white halos along hair and shoulders, teeth that look pure white with no shape, and background text that looks bold but unreadable. If you see any of these, revert to the original and run one gentler pass. You want your grandparents to look like themselves on a good day, not like digital illustrations.
Resolution Limits and When to Upscale Instead
Here is the honest truth about pixels. AI can improve old photo resolution in the perceived sense — edges look tighter, blur is reduced, and the photo holds up better on a modern screen. But it cannot invent true detail the camera never recorded. A license plate that was five blurred pixels will not become readable, and a distant face ten pixels wide will not gain a new expression.
If you want to make old photos clearer for everyday viewing, enhancement alone is usually enough. Your phone, laptop, and social feed display at roughly 2K or smaller, and a cleaned 1200 to 2000 pixel-wide scan looks crisp there. Judge clarity at that size, not at 300% zoom, because no consumer photo survives extreme pixel-peeping.
Upscale only for a specific output need. An 8x10 print at 300 DPI generally wants 2400 by 3000 pixels, and a framed 11x14 needs even more. In those cases, enhance first for clean edges, then upscale once to your target size and check the proof. For screen-only memories, skip upscaling — a sharp native-size file beats a bloated upscale. If your source is under 800 pixels wide, keep expectations modest: you will get a much cleaner small photo, not a gallery poster.
Frequently Asked Questions
Can AI improve old photo resolution?
It can improve perceived resolution by sharpening edges, reducing blur and compression artifacts, and cleaning noise, so the photo looks sharper on screen and in small prints. It cannot create true optical detail that was never captured, so tiny unreadable details will stay unreadable. For best results, enhance first at native size, then upscale only if you need more pixels for a large print.
Does enhancement work on phone pictures of prints?
Yes, if the capture is clean. Lay the print flat, kill glare with indirect daylight, align your phone squarely above it, and save at full resolution without filters. Enhancement can then sharpen and clean the image well. If the capture has reflections, heavy skew, or low-resolution compression, reshoot or flatbed scan it first.
Will my photo look fake after enhancing?
Not if you use a single moderate pass and check faces at 100% zoom. A fake look comes from stacking multiple enhancers or pushing strength too high, which creates halos, waxy skin, and over-white teeth. If you see those signs, revert to the original and rerun once at a lower strength.
How is enhancing different from upscaling?
Enhancing improves quality within your current pixels — sharper edges, less blur and noise, better clarity and tone. Upscaling increases pixel dimensions to make the file larger for big displays or prints. Enhance first to get clean pixels, then upscale only when you have a specific size target.
Try It Yourself
Try it yourself: upload your softest family print, run one enhance pass, and compare faces at full screen. If eyes and texture look clean, you are done in under a minute.
Start Enhancing Now